
MantaFluor Quick Start Guide

Solinst Eureka
2113 Wells Branch Pkwy, Suite 4400
Austin, TX, USA
78728
Tel: +1 512-302-4333
Fax: +1 512-251-6842
email: [email protected]
Download the MantaFluor App ( for iOS)
Install the MantaFluor App on your smartphone or tablet. It is available for free on the App Store. Or use the QR code to download the App.
 CAUTION: Never look directly into a fluorometer sensor while it is operating. The sensor emits highintensity ultraviolet (UV) or visible light, depending on the fluorometer type, which may cause eye injury.

Connecting to Your MantaFluor
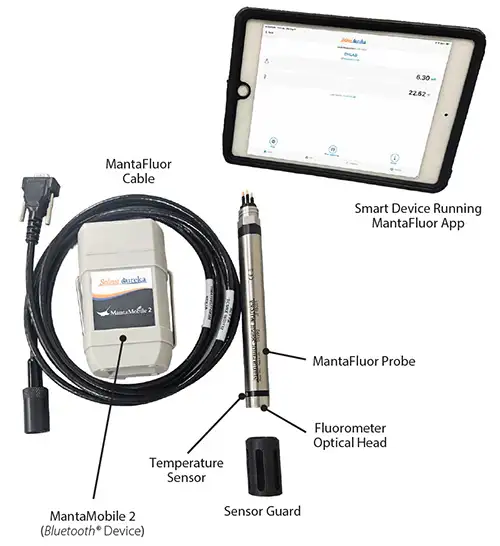
- Connect the MantaFluor Communication Cable to the MantaFluor probe. Line up the 6 pins, push the probe and cable together, then thread the black cable coupling onto the probe until finger-tight. Only twist the black cable coupling. Attach the cable to the MantaMobile 2 via the 9-pin connector.

Only tighten using the black coupling


Connect Your MantaFluor Cable to Your MantaFluor Probe
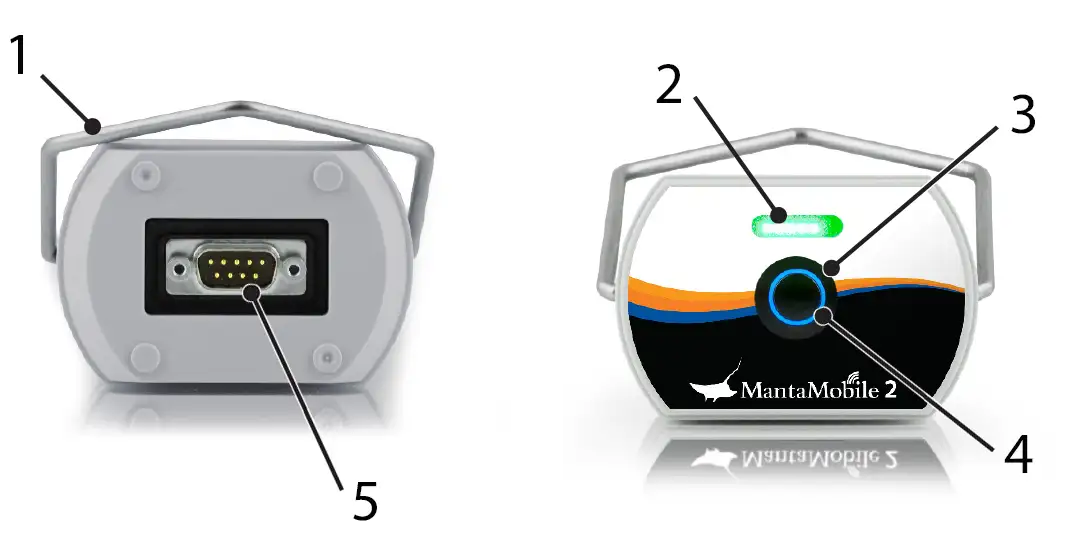
MantaMobile 2
2. Battery Life Indicator/Bluetooth Pairing Light
3. ON/OFF Switch
5. 9-Pin Connection for MantaFluor Communication Cable
- Press the power button to turn on the MantaMobile 2. After it powers on, it will show the battery status for 5 seconds. Solid green LEDs indicate battery status. After 5 seconds, the LEDs will flash blue to indicate “ready to pair”. Once the MantaMobile 2 is paired, the LEDs will turn solid blue for 5 seconds, then return to the battery life indicator. Five green LEDs indicate a full charge. Connect the MantaMobile 2 charger and recharge if needed (available through Solinst Eureka).
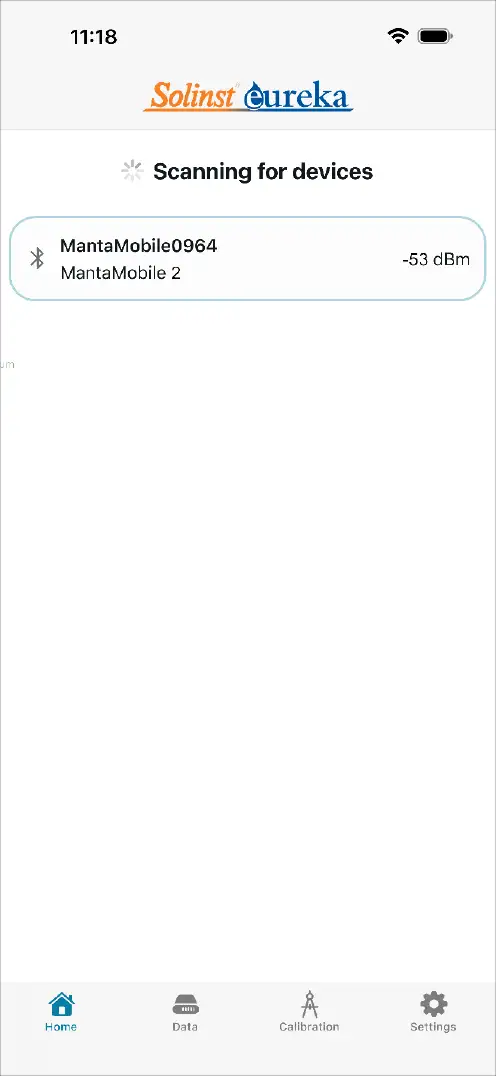
 Launch the MantaFluor App on your display device. The MantaFluor App will open, and you will see a list of available devices. Select the MantaMobile you want to connect to.
Note:
Do not attempt to pair through your device settings function. Only one MantaMobile 2 at a time may be connected to your device.
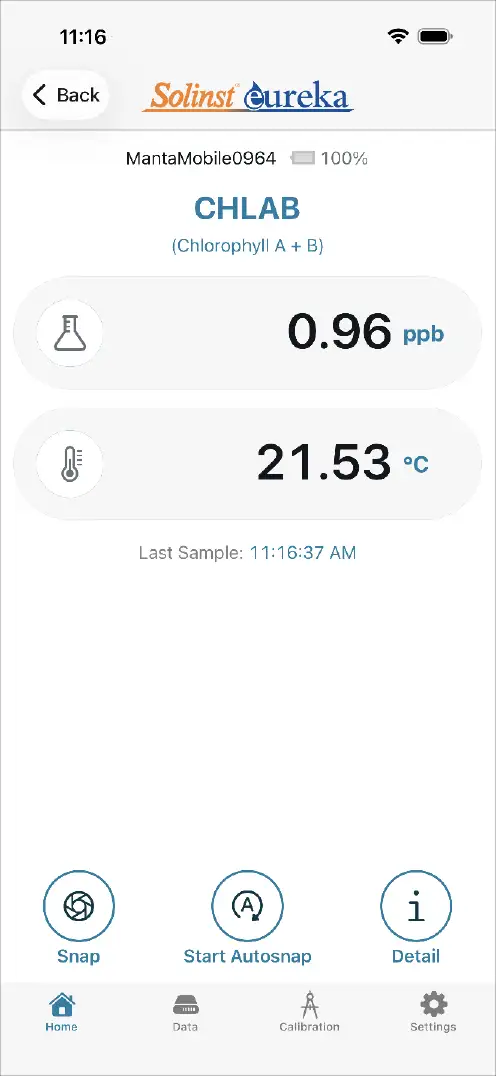
- Once you have selected your MantaFluor, the Home screen will display the name of the Fluorometer, its reading, and the temperature reading. The Last Sample time will also be displayed. Readings are refreshed every second.
Note:
MantaMobile 2 battery level will also be displayed on the Home screen.
Note:
Selecting Back in the Home screen will bring back the list of connected devices.
The MantaFluor App
At the bottom of the App screen, there will always be four “menu buttons”: Home, Data, Calibration, and Settings. When a MantaFluor is connected, near the bottom of the MantaFluor App Home screen are three “hot buttons”: Snap, Start Autosnap, and Detail.
Settings 
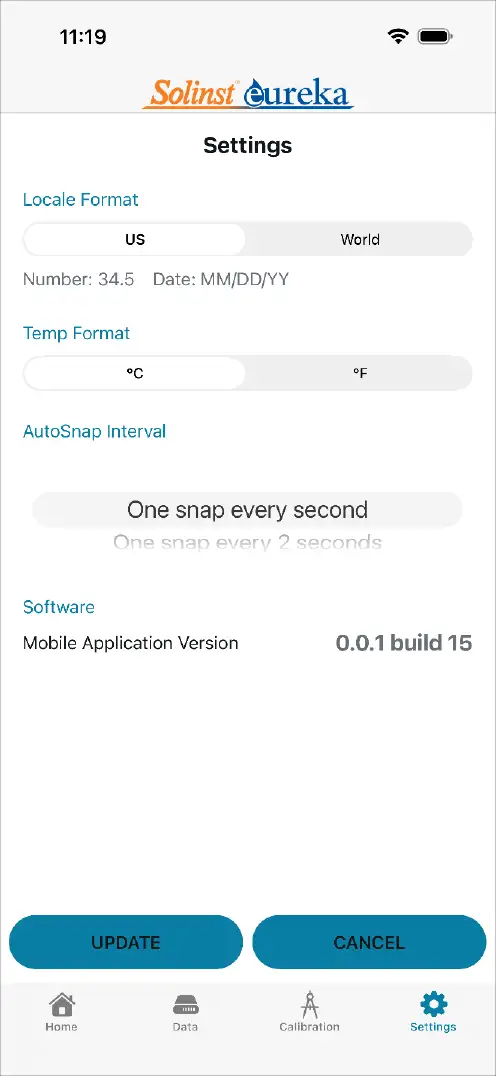
Before using your MantaFluor it is a good idea to select your desired settings. Tap Settings to bring up the options.
Locale Format: Select between US and World formats for displaying numbers and the date.
Temp Format: Select to display temperature in ºC or ºF.
Autosnap Interval: See Autosnap Section.
The MantaFluor App version number is also shown.
Note:
After you Update a setting, do not tap Cancel to exit the Settings screen, tap Home. If you tap Cancel, the new settings will not be applied.
Snap
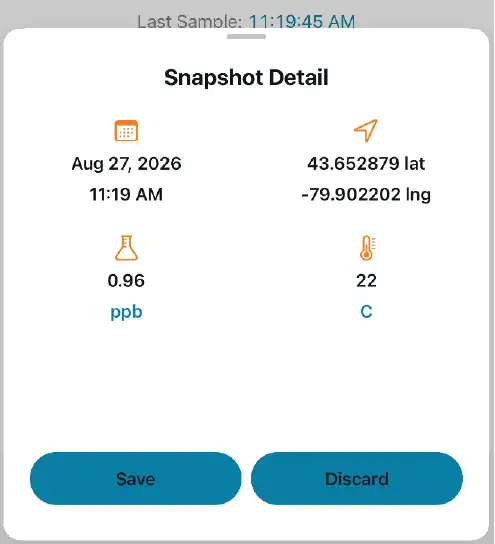
Snap (short for snapshot) lets you take an instant reading from your MantaFluor. Each snapshot includes the date and time, location information (latitude and longitude), the fluorometer reading, and the temperature reading.
You can decide to Save the data to your file or Discard the snapshot.
Note:
Snapshot data resides in your display device only, not in the MantaFluor.
Start Autosnap
Autosnap allows you to log data at a specified time interval.
Tap Start Autosnap to start recording data logs. You will hear a click each time the data is “snapped”, and the Start Autosnap icon will flash to indicate Autosnap is running. Tap Autosnap again to cease recording. One snap every second is the default setting.
To set the Autosnap Interval, go to the Settings menu. Scroll to select how often you want to record a snap. Tap Update and return to the Home screen.
Note:
After you Update a setting, do not tap Cancel to exit the Settings screen, tap Home. If you tap Cancel, the new settings will not be applied.
Detail
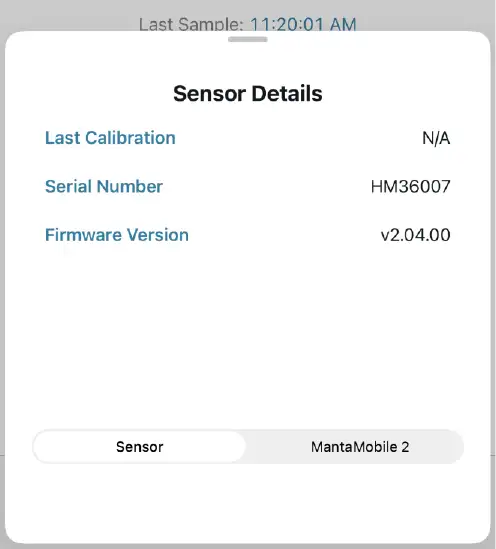
Tap Detail to view information for the connected MantaFluor sensor and MantaMobile 2.
Sensor Details include the Last Calibration date and time, Serial Number and Firmware Version.
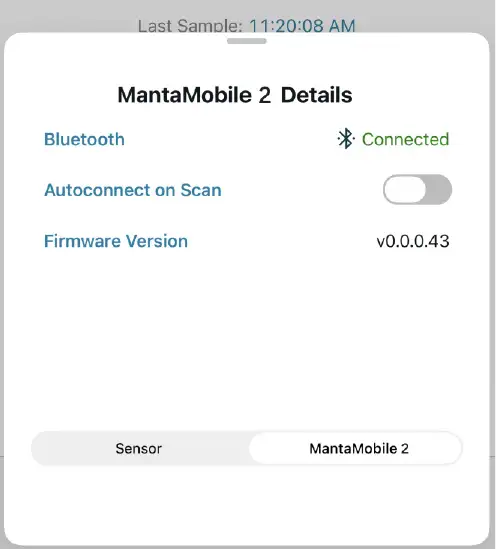
MantaMobile 2 Details include Bluetooth connection indication, Firmware Version, and the option to select Autoconnect the next time you connect the same MantaMobile 2.
Data
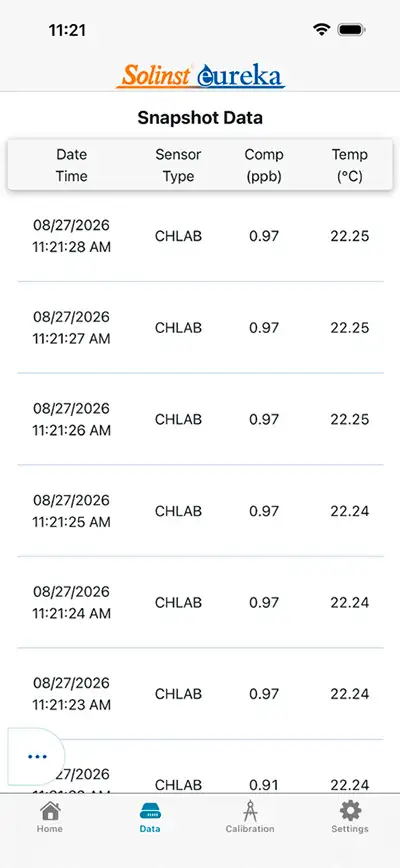
Tap the Data menu to scroll through all the MantaFluor App data recorded by your MantaFluor. Pull/swipe down on the screen to refresh your data as needed.
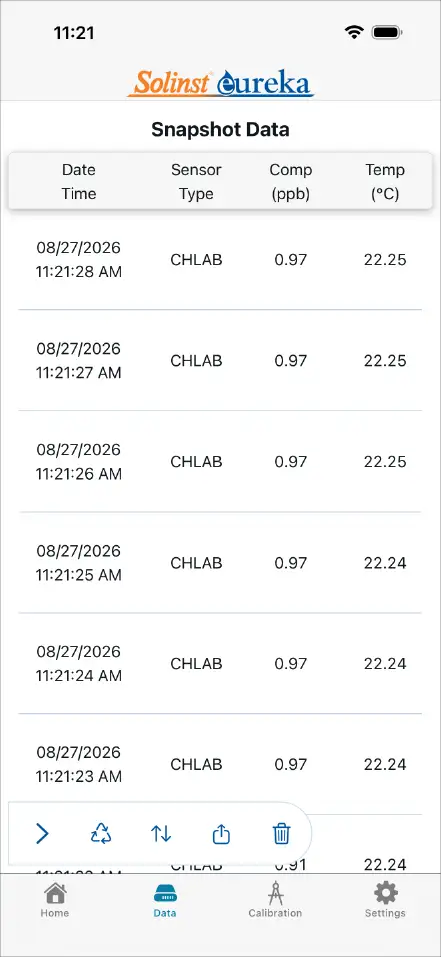
Tap to expand the “three-dot “ flyout menu at the bottom left of the Data screen to access more functions. Options are Refresh, Sort (ascending or descending), Share, and Trash (delete the data file).
Sharing Data Files
Tap the Share icon to export a CSV file of the data. You have the option to share data from the current day only or all data records.
After you make your selection, share options will be displayed, including text, other messaging apps,
email, etc.
From here you can create a new message with the CSV file attached.
Calibration
The MantaFluor has been calibrated before shipment and, depending on the fluorometer type and operating conditions, may not require recalibration for 6–12 months.
Deep-UV fluorometers may require more frequent calibration checks because excitation and emission filters may photobleach and LED performance may gradually deteriorate over time.
Each MantaFluor is factory-calibrated using a two-point calibration, typically zero and a known calibration standard. Because preparing standards using actual target materials, such as live algae or refined fuels, can be difficult, expensive, or require special handling, surrogate calibration standards are commonly used.
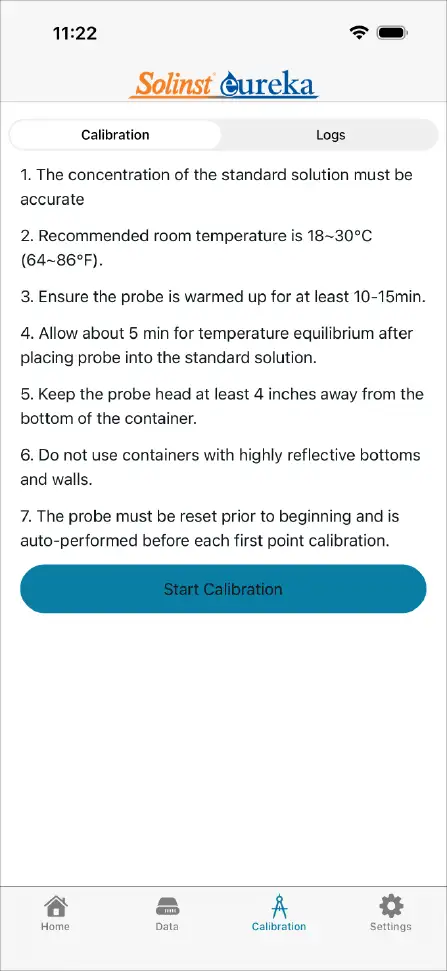
Review the following requirements to ensure accurate and repeatable calibration:
- Allow approximately 5 minutes for temperature equilibration after placing the sensor in the solution.
- Ensure the temperature sensor is completely submerged in the calibration solution.
- Maintain at least 10 cm (4 inches) of clearance between the sensor head and the bottom of the calibration container.
- Avoid containers with highly reflective bottoms or walls, such as glass beakers and certain plastics, which may interfere with fluorescence measurements.
- Perform calibration at room temperature, between 18–30°C (64–86°F).
- Allow the fluorometer to warm up for at least 10–15 minutes.
- Ensure the MantaFluor’s optical window is clean.
- Rinse with deionized (DI) water before each calibration point.
- Verify that the concentration of your calibration standard is accurate.
After reviewing the points above, to calibrate your MantaFluor sensor:
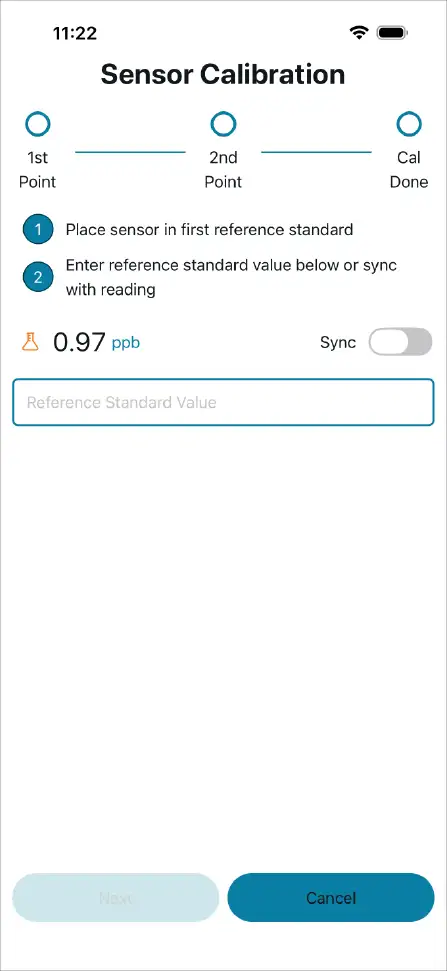
- Place your MantaFluor sensor in the first calibration solution. Allow for temperature equilibration.
- Tap Calibration in the MantaFluor App. Tap Start Calibration.
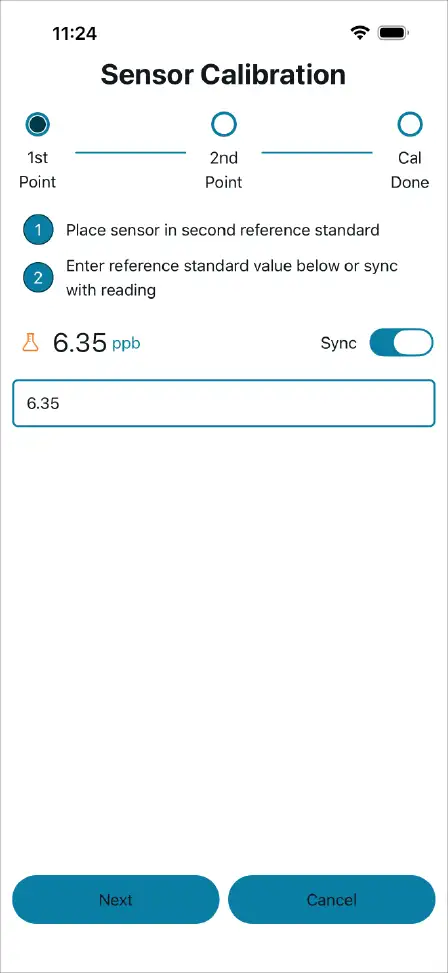
- Enter the value of the first reference standard, or tap sync to use the real time reading from the sensor. Tap Next.
- Rinse the probe with DI water and place in the second calibration standard. Allow temperature equilibration.
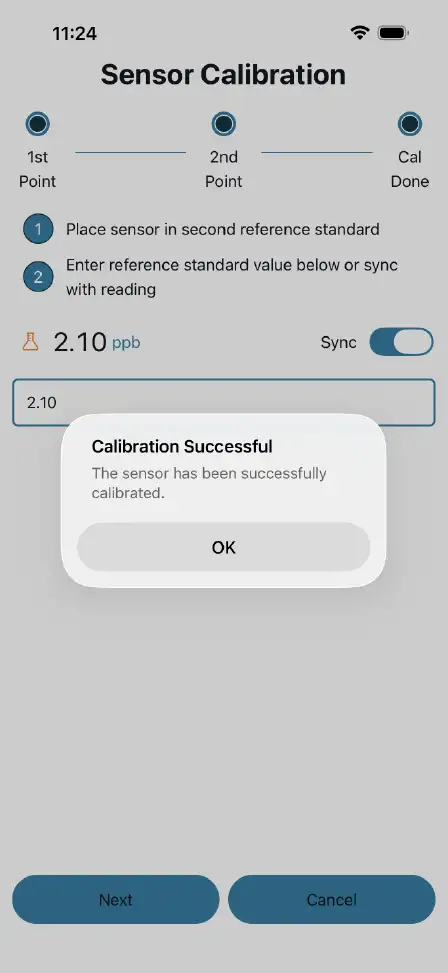
- Enter the value of the second reference standard, or tap sync to use the real time reading from the sensor. Tap Next.
- A pop-up message will indicate a successful calibration. Tap OK.
Calibration Logs
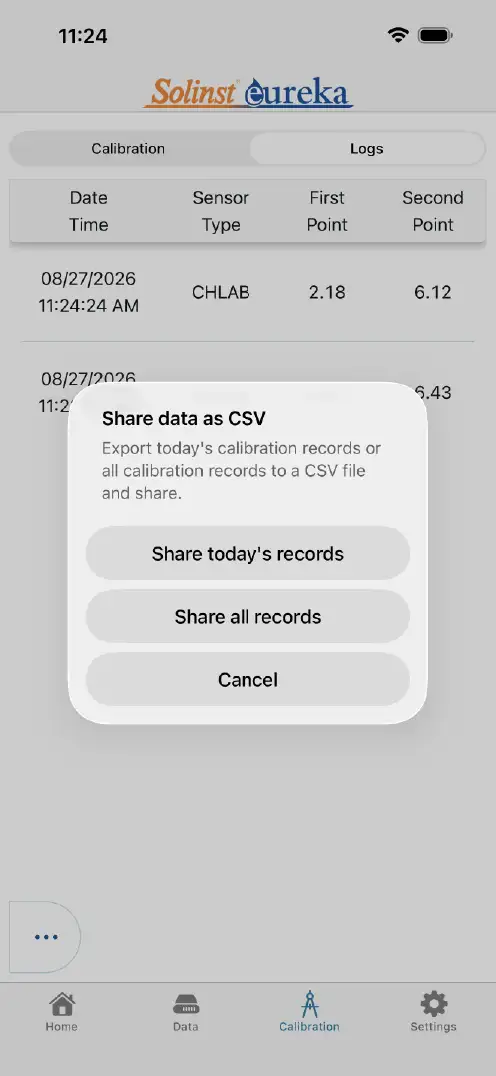
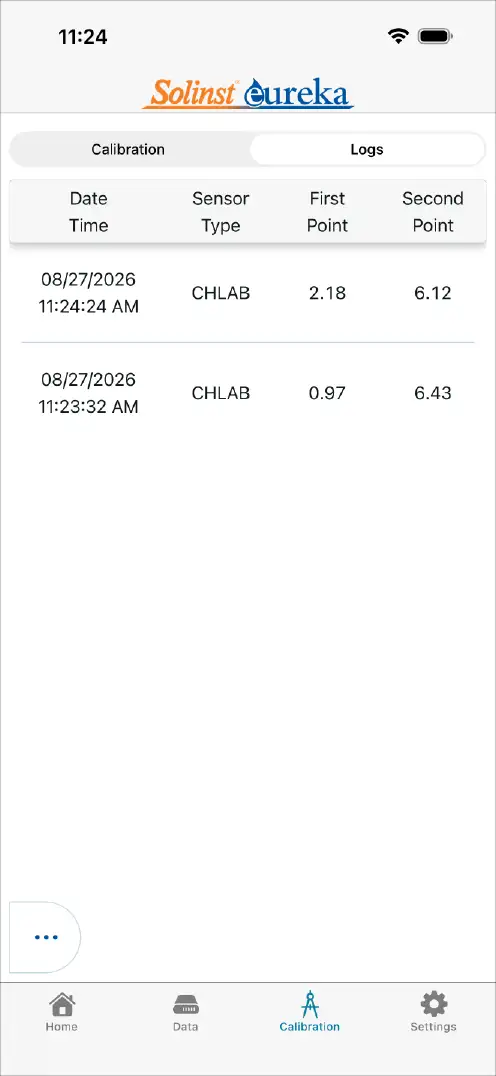
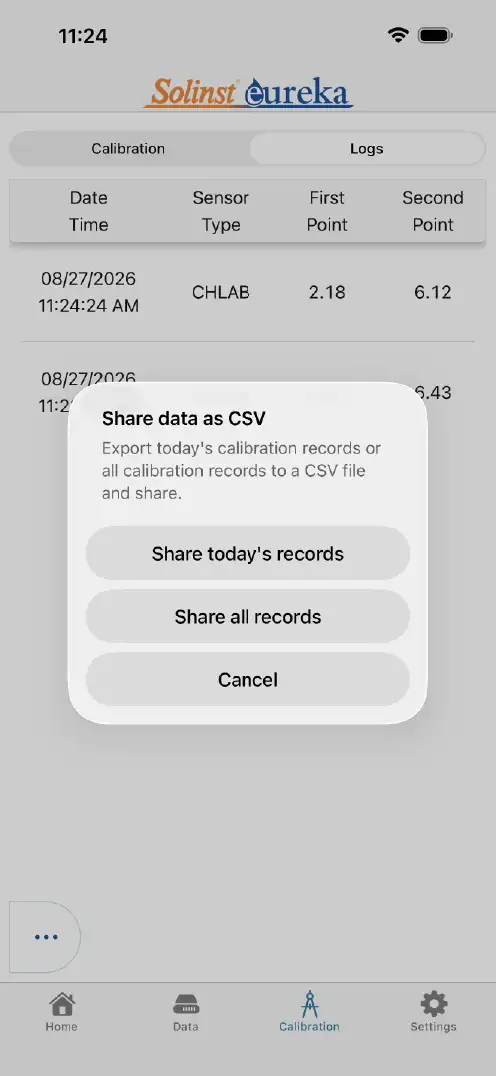
Each time you calibrate your MantaFluor a calibration log is stored on your device. To access the logs, tap Logs at the top right of the Calibration screen. Tap to expand the “three-dot “ flyout menu at the bottom left of the Logs screen to access the same functions as the Data menu. Tap the Share icon to export a CSV file of the calibration logs. You have the option to share logs from the current day only or all records. Sharing options will be the same as the Data options.
MantaFluor Field Notes
For good results, follow these best practices:
- Keep the probe head at least 10 cm or 4 inches away from any surface (e.g. lake or well bottom) when taking a measurement.
- Use of the Sensor Guard is recommended to protect the optical head of the Fluorometer. It is held in place by friction fit.
- Make sure the temperature sensor is completely submerged and not blocked.
- Allow for 5 minutes of temperature equilibration before taking your first reading, especially when moving your probe between temperature extremes.
- The operating temperature of the MantaFluor is 0–50ºC.

- Sensor Guard
- Temperature Sensor
MantaFluor Maintenance
As with any monitoring project, you should select the proper equipment and determine a maintenance schedule based on the environment specific to your application.
- Cleaning the sensor – Rinse the sensor in fresh water following each deployment, ideally until it is completely clean again. Do not let the sensor come in contact with any organic solvents, such as acetone and methanol, or strong acids and bases.
- Cleaning the optics – Visually inspect the optical window after each deployment following a soaking in fresh water. Use optical tissue to clean the window with soapy water, if needed.
- Proper storage – When not in use, store the MantaFluor at temperature between 0 ºC and 50 ºC
Related Products
Manta Trimeter Water Quality Probe
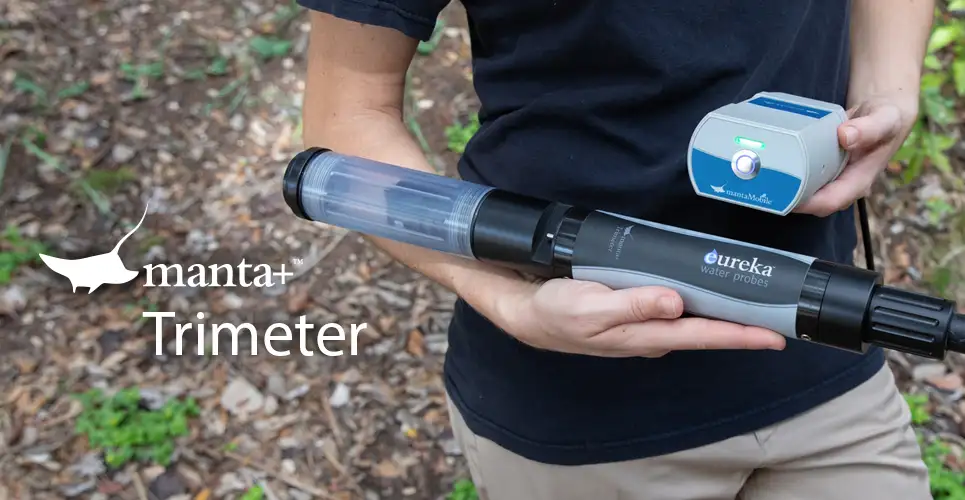
The Trimeter holds any one sensor* from the Sensor Parameters list, Plus temperature and depth sensors (both are optional). For example, a Trimeter configuration could be turbidity, temperature, and depth. Another example could be DO and temperature.
EasyProbe: Water Quality Sondes
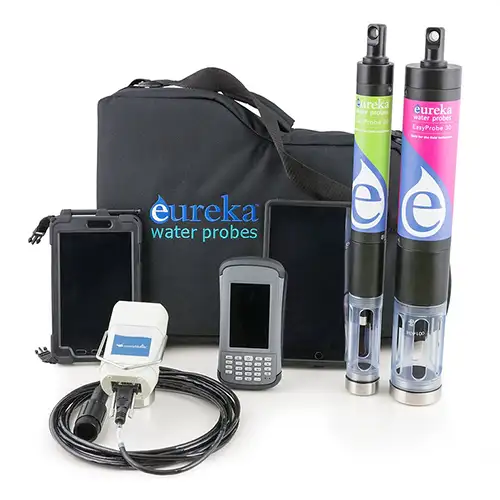
The EasyProbe, by Solinst Eureka, is a high-performance, cost-effective water quality monitor. It's ideal for spot-checking, remote telemetry, education, research, aquaculture, and more. The EasyProbe20 includes sensors for temperature, dissolved oxygen, conductivity, and pH, while the EasyProbe30 adds a turbidity sensor. Eureka multiprobes are known for their reliability, with a three-year warranty covering all sensors, and have the lowest maintenance costs in the industry.

Water Level, Temperature & Conductivity Datalogging
The Levelogger 6 LTC measures and logs water level fluctuations, temperature and conductivity. It is programmed to record at intervals as often as 2 seconds. It includes an 8-year battery, memory for 100,000 sets of readings, and comes in 6 pressure ranges. A PFAS-free coating (inside and out) provides superior corrosion and abrasion resistance.
TLC Meter – Measure Accurate Temperature, Level & Conductivity
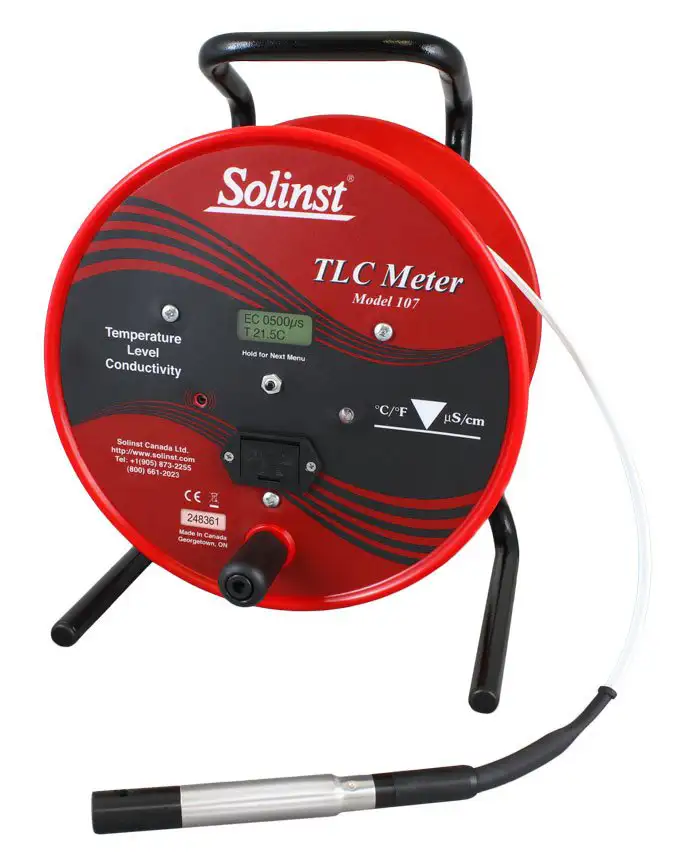
A TLC Meter provides accurate, stable temperature and conductivity measurements, displayed on a convenient LCD display for easy reading. Static water level and depth of readings are read off Solinst flat tape, which is precisely laser-marked every mm or 1/100 ft. Tape lengths are available to 300 m (1000 ft).


