Tools and Materials Needed
- Utility Knife
- Small Piece of Sandpaper
- Small Plumbing 'Pipe Cutter'
- 1/2" (13 mm) Wrench
- 9/16" (15 mm) Wrench
Instructions
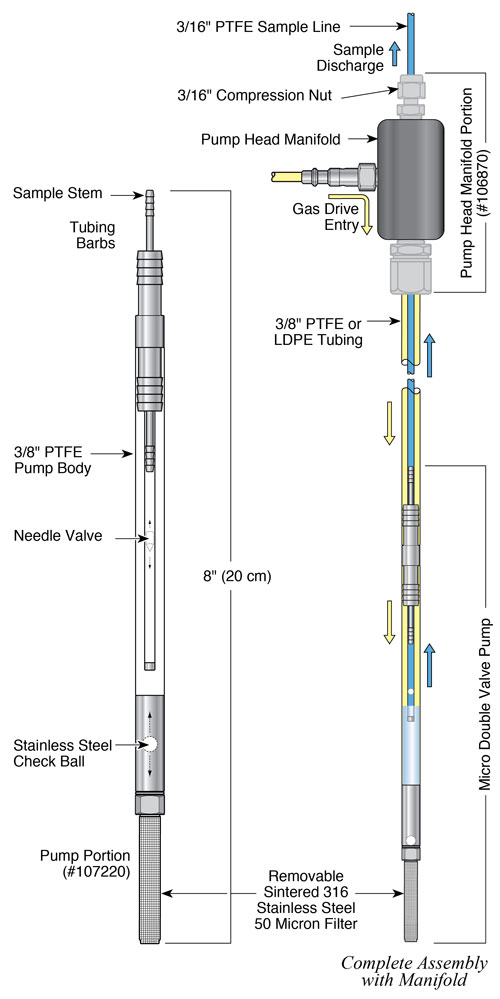
Remove the pump from the co-axial tubing
- With the 408M pump assembly stretched out, remove the 408M Pump by cutting through the co-axial tubing at a point just above the pump's sample stem. Remove any tubing that remains on either tubing barb.
- Shorten the pump assembly by cutting and removing the excess length of co-axial tubing. You may want to save this cut piece of co-axial tubing, to re-attach later.
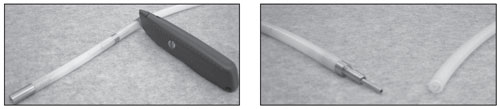
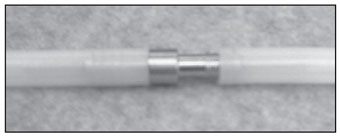
Remove outer tubing, cut inner tubing on an angle and replace inner tubing on barb
- Using a small 'pipe cutter', at the newly cut tubing end, remove approximately 1" (2.5 cm) of the outer 3/8" dia. tubing. So as to not block water flow, cut the inner 3/16" dia. tubing on an angle as shown in the photo above. Reattach the inner 3/16" tubing to the barbed sample stem.
Note:
Use a piece of sandpaper to help push the tubing onto the tubing barb.
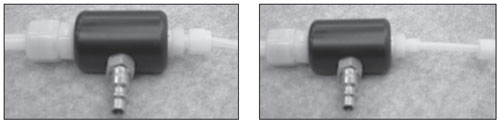
Loosen the compression fitting nut
- Use the 1/2" (13 mm) and 9/16" (15 mm) wrenches to loosen the 3/16" compression nut fitting, and pull the nut and inner ferrule back by about 1" (2.5 cm).
- Re-attach the outer 3/8" dia. tubing to the tubing barb, by pulling down on the 3/8" dia. tubing, while pulling up on the 3/16" dia. tubing at the pump head manifold.
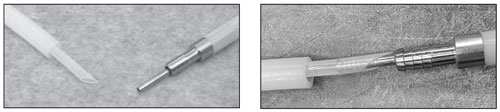
Re-attach outer tubing
Note:
Use a piece of sandpaper to help push the tubing onto the tubing barb.
- Slide the 3/16" nut down and re-tighten. The 408M Pump re-assembly is now complete. See separate operating instructions.
Tighten the compression fitting nut