Tools and Materials Needed
- 464 Battery Enclosure Assembly (Spare) (#111194)
- 3/32" Allen Key
Instructions
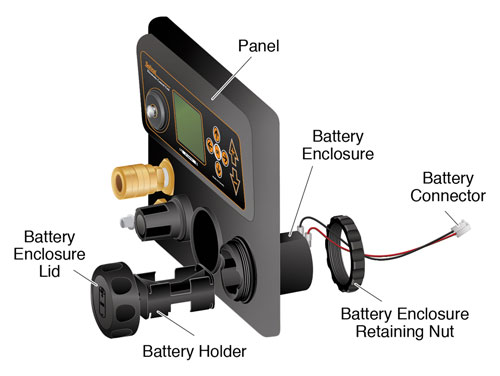
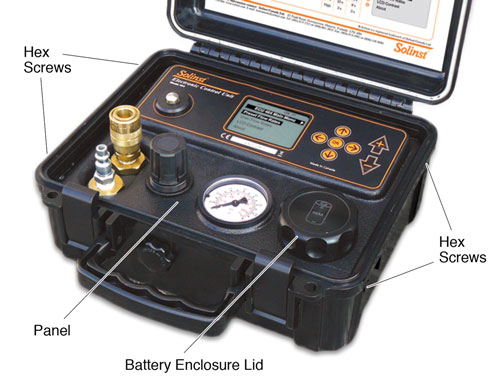
- Turn the Control Unit off and remove the battery enclosure lid and the battery holder from the battery enclosure.
- Use the 3/32" Allen key to undo the four hex screws on the sides of the Control Unit.
- Remove the panel from the Control Unit and flip it over to access the back of the battery enclosure.
- Unplug the battery connector from the cicuit board.
- To gain better access to the battery enclosure, disconnect any tubing that may be in the way (especially when working with previous Mk1 and Mk2 versions). To remove the tubing, push on the "grasping ring" of the tubing fitting (to release tubing) and pull the tubing out. Remember where the tubing was connected.
- Unscrew the retaining nut from the battery enclosure and remove the enclosure from the panel.
- Insert the new battery enclosure through the front of the panel and secure in place using the retaining nut.
- Plug the battery connector into the circuit board.
- Reconnect any tubing by pushing back into the fittings.
- Reinstall the batteries in the new battery holder and install the holder in the new battery enclosure.
- Test the Control Unit using compressed air to ensure proper connections were made during the replacement.
- Place the panel in the Control Unit case and re-install the four hex screws.
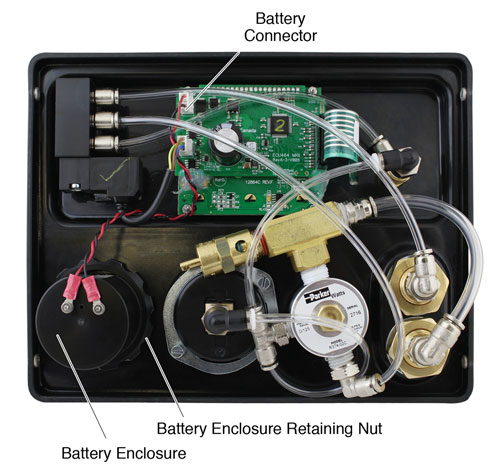
Back of Mk3 464 125 psi Control Unit Panel
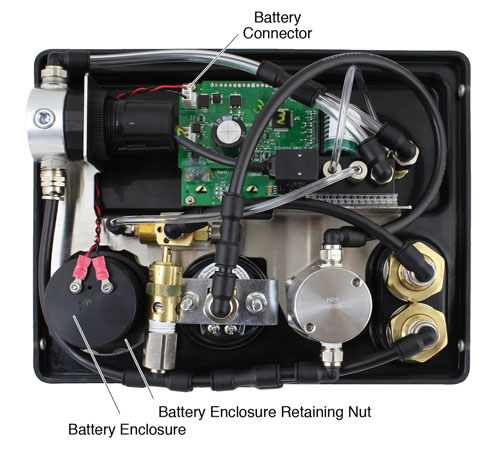
Back of Mk3 464 250 psi Control Unit Panel
