Note:
The PTFE check ball sinks in water. The Polypropylene check ball floats in water.
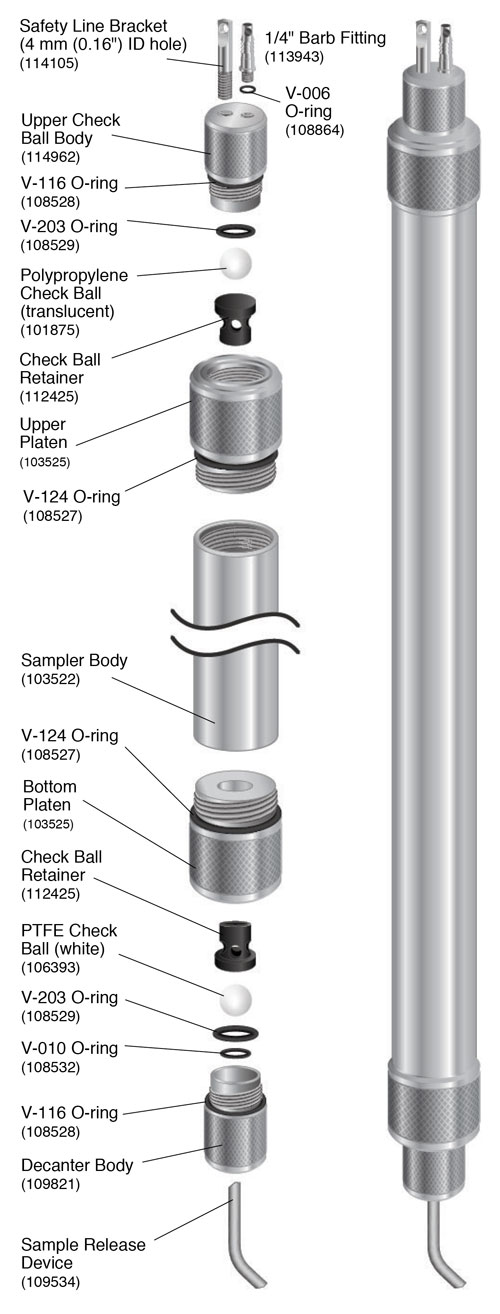
- Ensure there is a V-116 o-ring installed on the Decanter Body.
- Push the V-010 o-ring inside the Decanter Body.
- Place the V-203 o-ring inside the Decanter Body.
- Place the PTFE check ball in the Decanter Body.
- Insert and push the Check Ball Retainer into the Decanter Body until flush with the outer edge.
- Thread the Decanter Body into the Bottom Platen until it is finger tight.
- Ensure there is a V-124 o-ring installed on the Bottom Platen and thread the Bottom Platen into the Sampler Body until finger tight.
- Ensure there is a V-116 o-ring installed on the Upper Check Ball Body.
- Place the V-203 o-ring inside the Upper Check Ball Body.
- Place the Polypropylene check ball in the Upper Check Ball Body.
- Insert and push the Check Ball Retainer into the Upper Check Ball Body until flush with the outer edge.
- Thread the Upper Check Ball Body into the Top Platen until it is finger tight.
- Ensure there is a V-124 o-ring installed on the Top Platen and thread the Top Platen into the Sampler Body until finger tight.
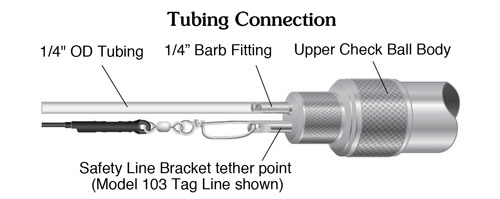
- If required, a small (2 mm) Allen key can be used to tighten and/ or loosen the Barb Fitting and Saftey Line Bracket on the Upper Check Ball Body.
- Push the tubing onto the Barb Fitting. Check the connection by pulling firmly on the tubing. It should not pull off of the fitting.
Note:
Use an awl to open the very tip of the tubing, or heat the tubing to help push it completely over all the barbs.


