Use the drop-down menus to select the project and the report type (table or charts) that you want to view. Use the filters to view data with different units, time intervals, or isolate one datalogger or specific parameter. You can select to Refresh the Report at any time.
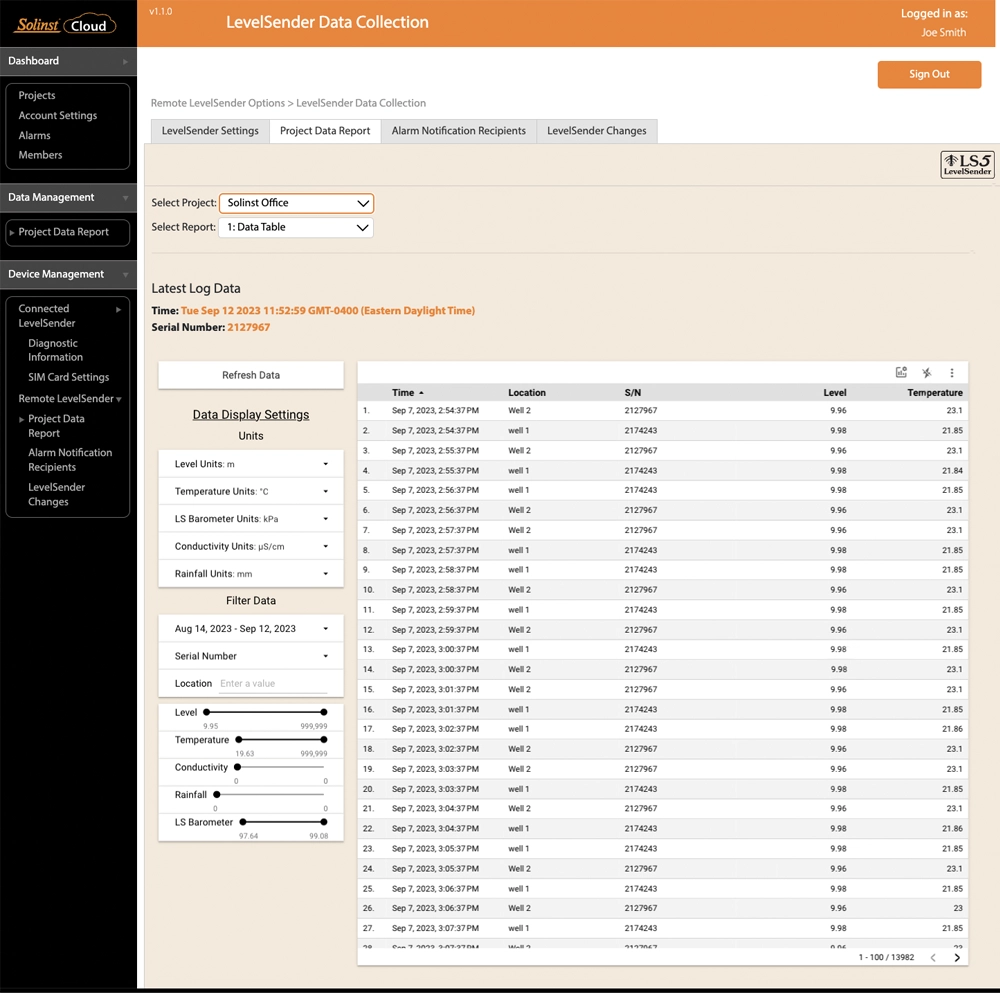
Figure 6-1 Project Data Report
The Report types available are:
- Data Table
- Level/Temperature/Conductivity Charts
- Rainfall/Barometer Charts
- Logger Comparison Chart
- Location-based Charts
- Metric Cards
- Map
Note:
If you select "Looker Studio" at the bottom of the data report, you will be taken to a demo project report as an example.
6.1.1 Downloading Reports
Data reports from each connected datalogger can be downloaded to your computer as *.xle files. These data files can be opened using Solinst Levelogger PC Software. See the Levelogger User Guide for more information. Both the raw data and compensated data files will be downloaded.
You can select a number of reports at once, then click Download Selected Reports to download them all at once. You can download a single set of datalogger files by clicking the Download ![]() icon to the right of the file in the list.
icon to the right of the file in the list.

Figure 6-2 Download Reports
6.1.2 Manual Data Adjustment
There is also the option to perform a Manual Data Adjustment. This allows you to enter a manual water level measurement or reference point, which all the water level readings from the selected Levelogger will then be adjusted to.
To perform an adjustment, select Manual Compensation from the Select Report drop-down menu.
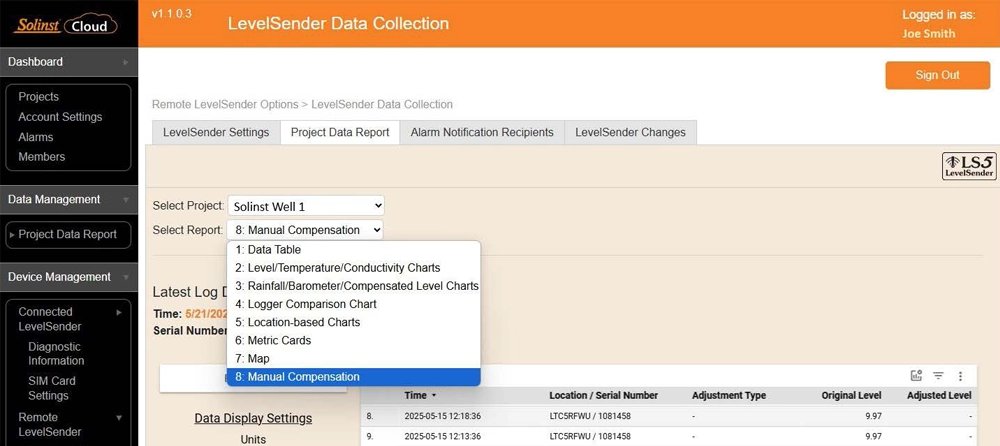
Figure 6-3 Manual Compensation Option
Expand the Manual Data Adjustment section at the bottom of the window. Select the Location of the desired Levelogger from the drop-down menu, then select the Levelogger by serial number from the next drop-down menu.
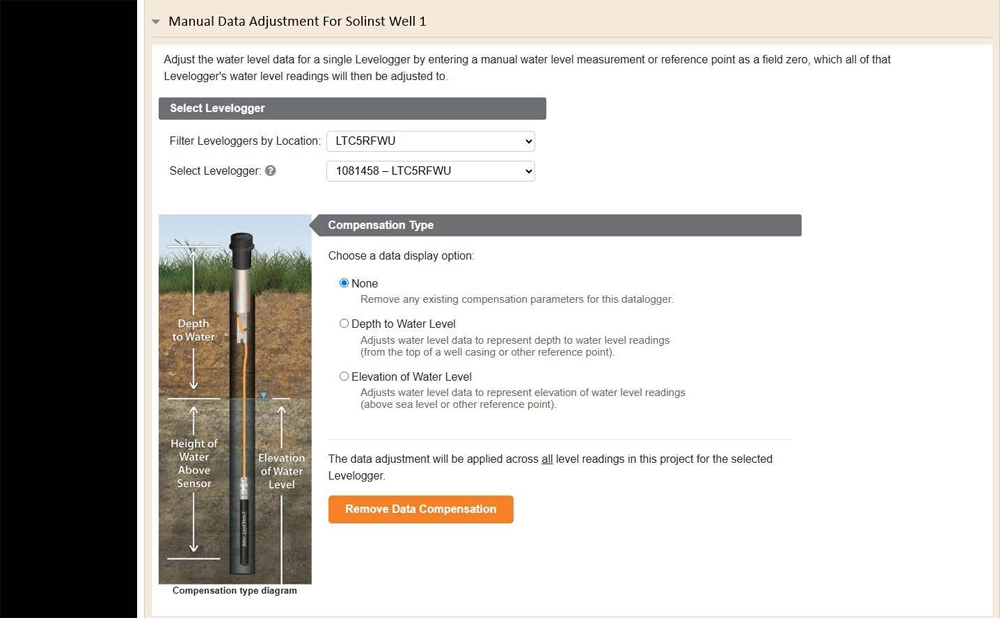
Figure 6-4 Location and Levelogger Selection
To adjust the Levelogger data to represent depth water level readings (from the top of a well casing or other reference point), select Depth to Water Level as the Compensation Type.
Enter the Field Zero (depth to water from the reference point). The Field Zero must replace an actual level reading from the Levelogger data set.
To select that Levelogger reading, choose a date and time for the Field Zero (you can refer to the data table displayed in the section above to find an appropriate time). Set a Time Search Range, then click Find Readings. This will narrow down the Levelogger readings available to select from the drop-down menu. Select the Levelogger reading that you want to replace from the drop-down menu.
You can choose to view the barometrically compensated data or raw water level readings.
Click Apply Data Compensation.
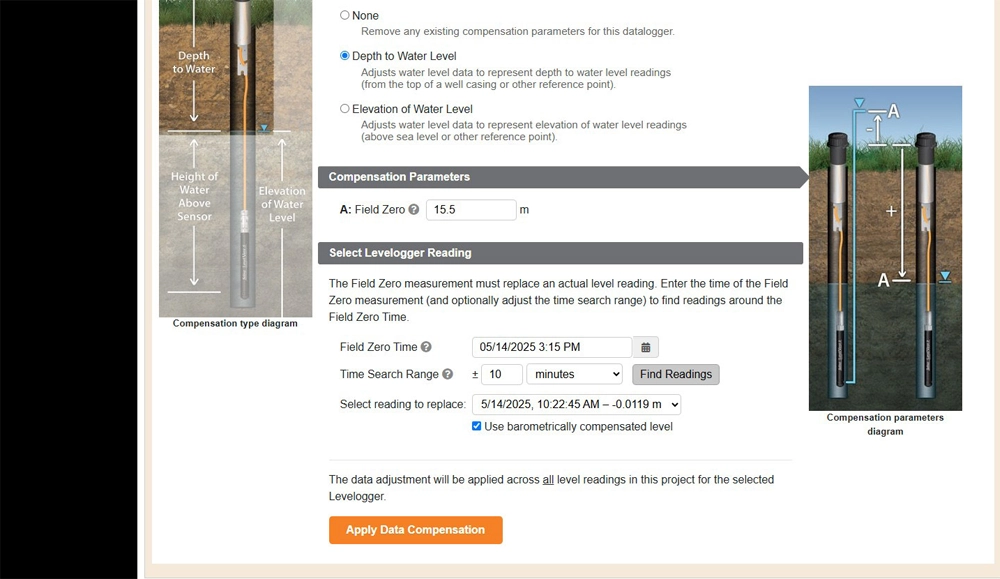
Figure 6-5 Depth to Water Level Adjustment
After any data adjustment, click Refresh Data to view the adjusted data.
The Compensation Parameters used in the data adjustment will be shown in a table below the data table.
You can Export the data to various file types, including .csv, by clicking the three dots at the top right of the data table.
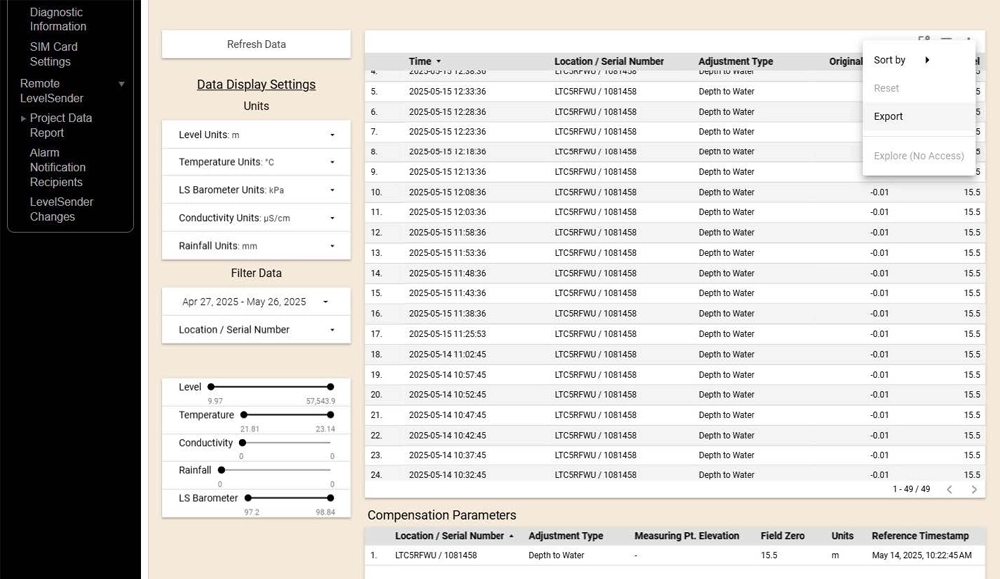
Figure 6-6 Adjusted Data Set
To adjust your Levelogger data to Elevation of Water Level readings (above seal level or other reference point), follow the same steps as the Depth to Water Level adjustment, but you will also need to enter a Measuring Point Elevation in addition to a Field Zero value. Refer to the Compensation Parameters Diagram provided for an explanation of the values to enter.
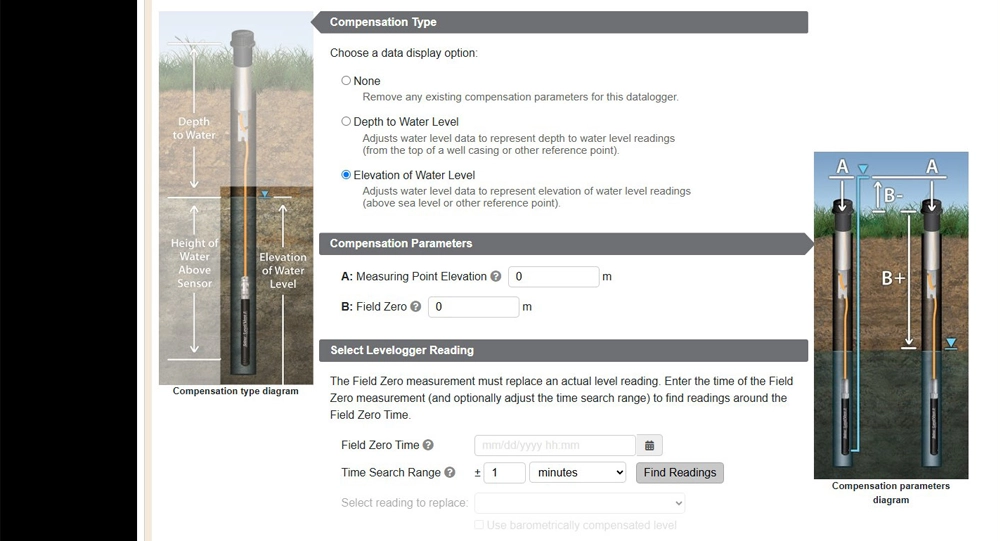
Figure 6-7 Elevation of Water Adjustment
To clear any data adjustments, select None as the Compensation type, then click Remove Data Compensation.
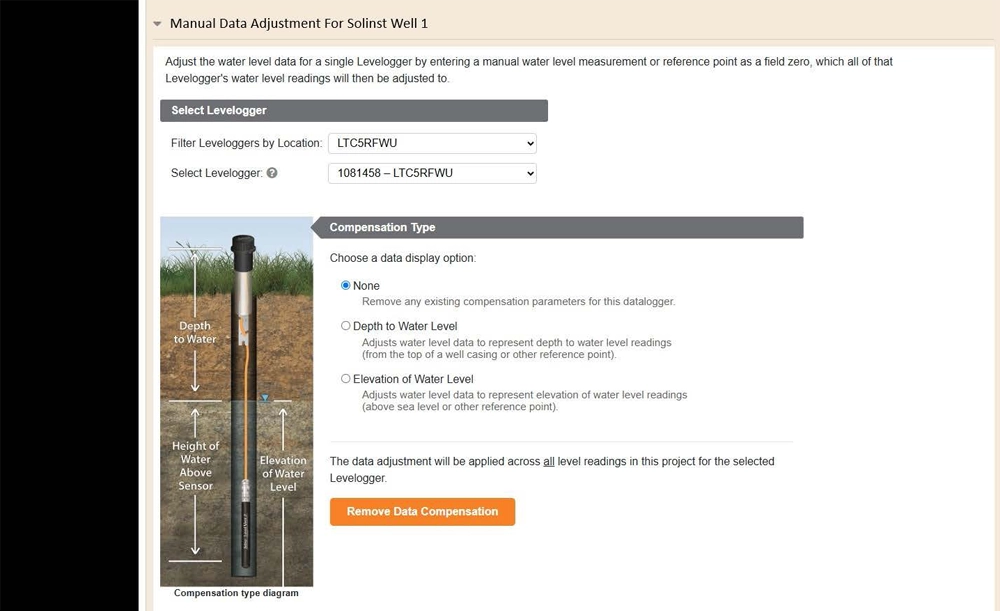
Figure 6-8 Remove Data Adjustment


