Editing the Network Setup
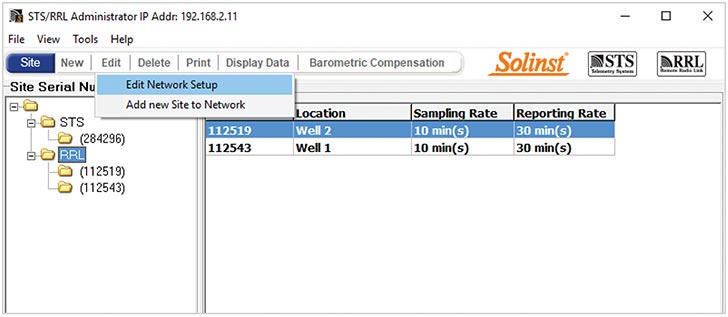
When you select a RRL Network from the list in the STS Administrator window, choosing "Edit Site Setup" will allow you to "Edit Network Setup" or "Add new Site to Network".

Figure 4-18 Editing a RRL Network
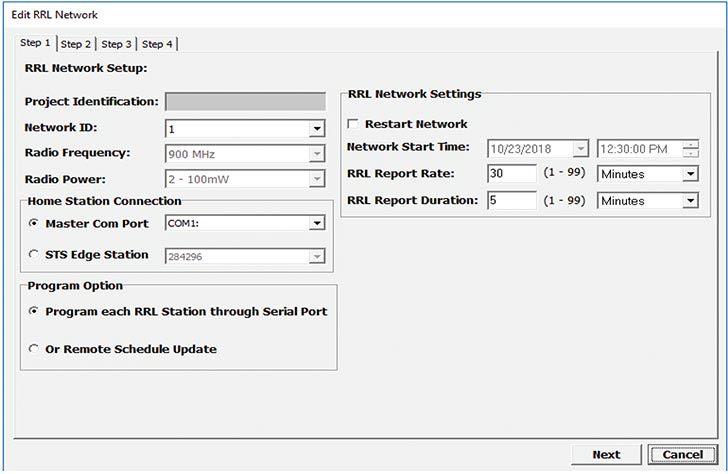
When you select "Edit Network Setup" there are two options. You can choose to update each RRL Station in the network by connecting them to the PC through the RS232 Port, or the "Remote Schedule Update" allows you to make the changes in the software, and the new settings will be applied to each RRL Station with their next scheduled report to the Home Station.
Note:
Selecting "Delete" when a RRL Network is highlighted, will not allow you to delete that network, until all stations in that network are deleted first. To delete a RRL Station from the list, click to highlight the serial number, and select "Delete" from the main menu bar.
If you choose "Remote Schedule Update", there are two steps. Step 1 allows you to make changes to the network settings, including: Project Identification, Network ID, and Radio Power. You can also restart the network with a new Sampling Rate, Report Rate, and Report Duration.

Figure 4-19 Editing a RRL Network - Step 1

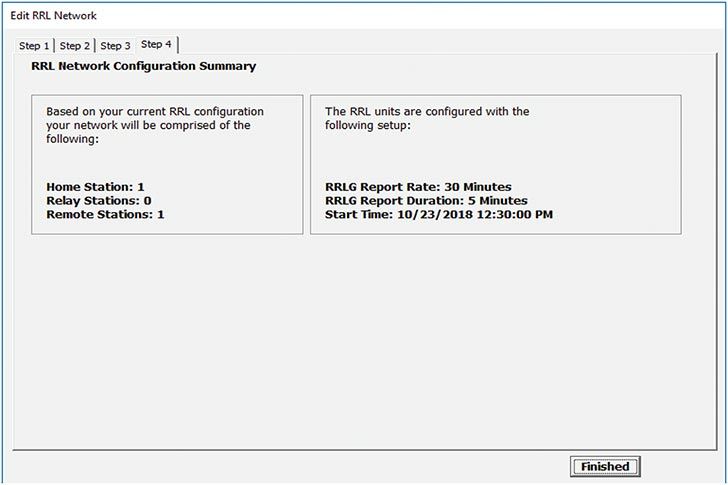
Figure 4-20 Editing a RRL Network - Step 2
Note:
Figure 4-20 shows 4 steps. This is because the option to update each RRL Station through the serial port was selected. Steps 2 and 3 in this case are for connecting the two Remote RRL Stations in the network, to the PC and updating their settings. Step 4 provides the summary.
Step 2 will provide you with a new Network Configuration Summary that you can print for your records.
If you select to update each RRL Station through the serial port, after changing the setting in Step 1, you will be prompted to connect each RRL Station to the Home Station PC with an RS232 cable, and update them with the new network settings. The last step will provide you with a Network Configuration Summary for your records.
When you select "Add new Site to Network", you will be prompted though Steps 2 through 7 of the software wizard.


